When starting to learn AI programming, many people get stuck at the very first step - unable to run Claude Code or OpenAI Codex programs on their Windows computers.
This is normal and easy to solve. Next, I’ll use Windows 11 as an example to introduce how AI programming beginners can easily handle environment setup, helping you smoothly enter the world of AI programming.
macOS or Linux systems have advantages in AI programming, but not everyone can afford to buy an Apple MacBook for this purpose, and switching Windows computers to Linux seems like a fantasy for most people.
Self-Assessment: Do You Need Command-Line Programming Assistants?
This is a question every AI programming beginner must ask themselves first. If you just want to experience AI programming, then installing Microsoft’s free code editor VS Code is sufficient, or installing Cursor, a code editor purely focused on AI programming development.
- VS Code Official Download: https://code.visualstudio.com/download
- Cursor Official Download: https://cursor.com/cn/download
- TRAE Official Download:
- Chinese Version: https://www.trae.cn/
- International Version: https://www.trae.ai/
VS Code is open-source software maintained by Microsoft, available for free use by anyone. Cursor uses a subscription model with free options for experience, but normal use usually requires a paid plan. TRAE is similar to Cursor, using a subscription model but with more free resources.
These are graphical software, very friendly to Windows systems. You can download and install them directly from official websites without complex environment setup.
But if you want to go further and use command-line programming assistants like the currently most popular Claude Code, OpenAI Codex, Gemini CLI, Qwen CLI, etc., then you’ll need to invest some time and effort to properly configure the environment required for the programs to run. Otherwise, you won’t be able to follow others’ tutorials normally.
Why Do You Need NodeJS?
As someone confident about learning AI programming, you should remain calm about any unfamiliar terms (whether in English or Chinese). You need to believe that this is a guide for AI programming beginners, so the terms appearing here are necessary for you to understand at this stage.
You can completely understand why you need to install NodeJS on your Windows system without knowing what NodeJS is. Just like you need to install a gas water heater during renovation without knowing its internal structure and working principles.
The reason is simple: popular command-line programming assistants like Claude Code, OpenAI Codex, Gemini CLI, Qwen CLI, etc., are all developed based on NodeJS. Your system must have NodeJS to install and use these programming assistants.
Installing NodeJS
Here I’ll provide two installation methods. Choose according to your needs and capabilities.
Method 1: Direct NodeJS Installation
This is the simplest method. Open the NodeJS official website download page, find and download the installer at the bottom, and install directly.
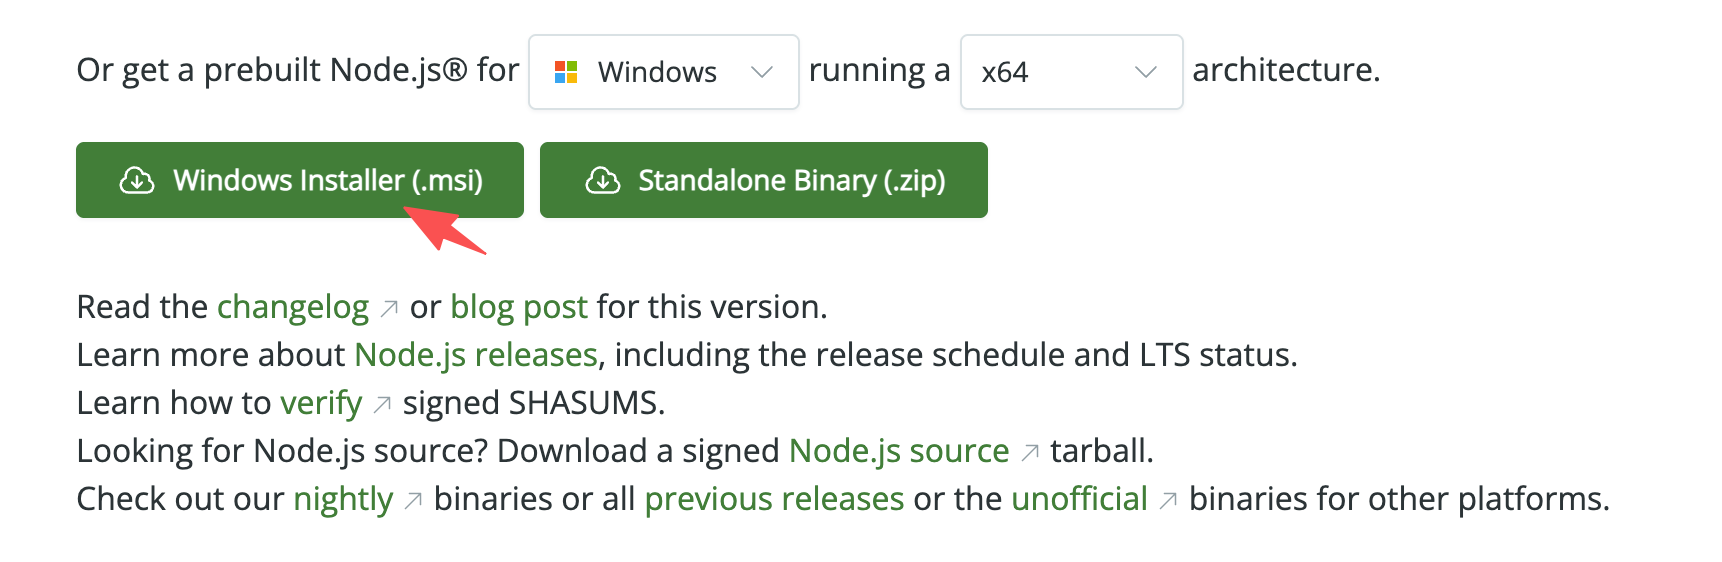
The advantage of this method is that it’s very simple - just download and install. The disadvantage is that you can only install one version at a time. Of course, this might not be a disadvantage for most people. It only becomes an issue when multiple tools you run require different NodeJS versions.
Method 2: Installing NodeJS Under WSL 2
If you’re interested in learning more about AI programming, Linux systems, and terminal command lines, this is the most worthwhile option to try on Windows systems.
WSL stands for Windows Subsystem for Linux, meaning a Linux system running on Windows.
WSL is a treasure tool for developers using Windows systems. It allows us to run a native Linux system on the current Windows system without much hassle. Does that sound convoluted and strange?
Remember when I said at the beginning of this article that “macOS and Linux systems have advantages in AI programming”? Now, once you get WSL working, you’ll effortlessly have a Linux system, and you’ll have it within your familiar Windows environment. Congratulations on easily gaining this advantage!
Installing WSL2
Installing WSL requires your system to meet the following requirements:
- ✅ Windows 10 version 2004 or higher (or Windows 11)
- ✅ Virtualization enabled (enabled by default on most computers)
You can open Task Manager (Ctrl + Shift + Esc key combination). As shown below, if “Virtual machine” shows “Yes”, it means virtualization is enabled.
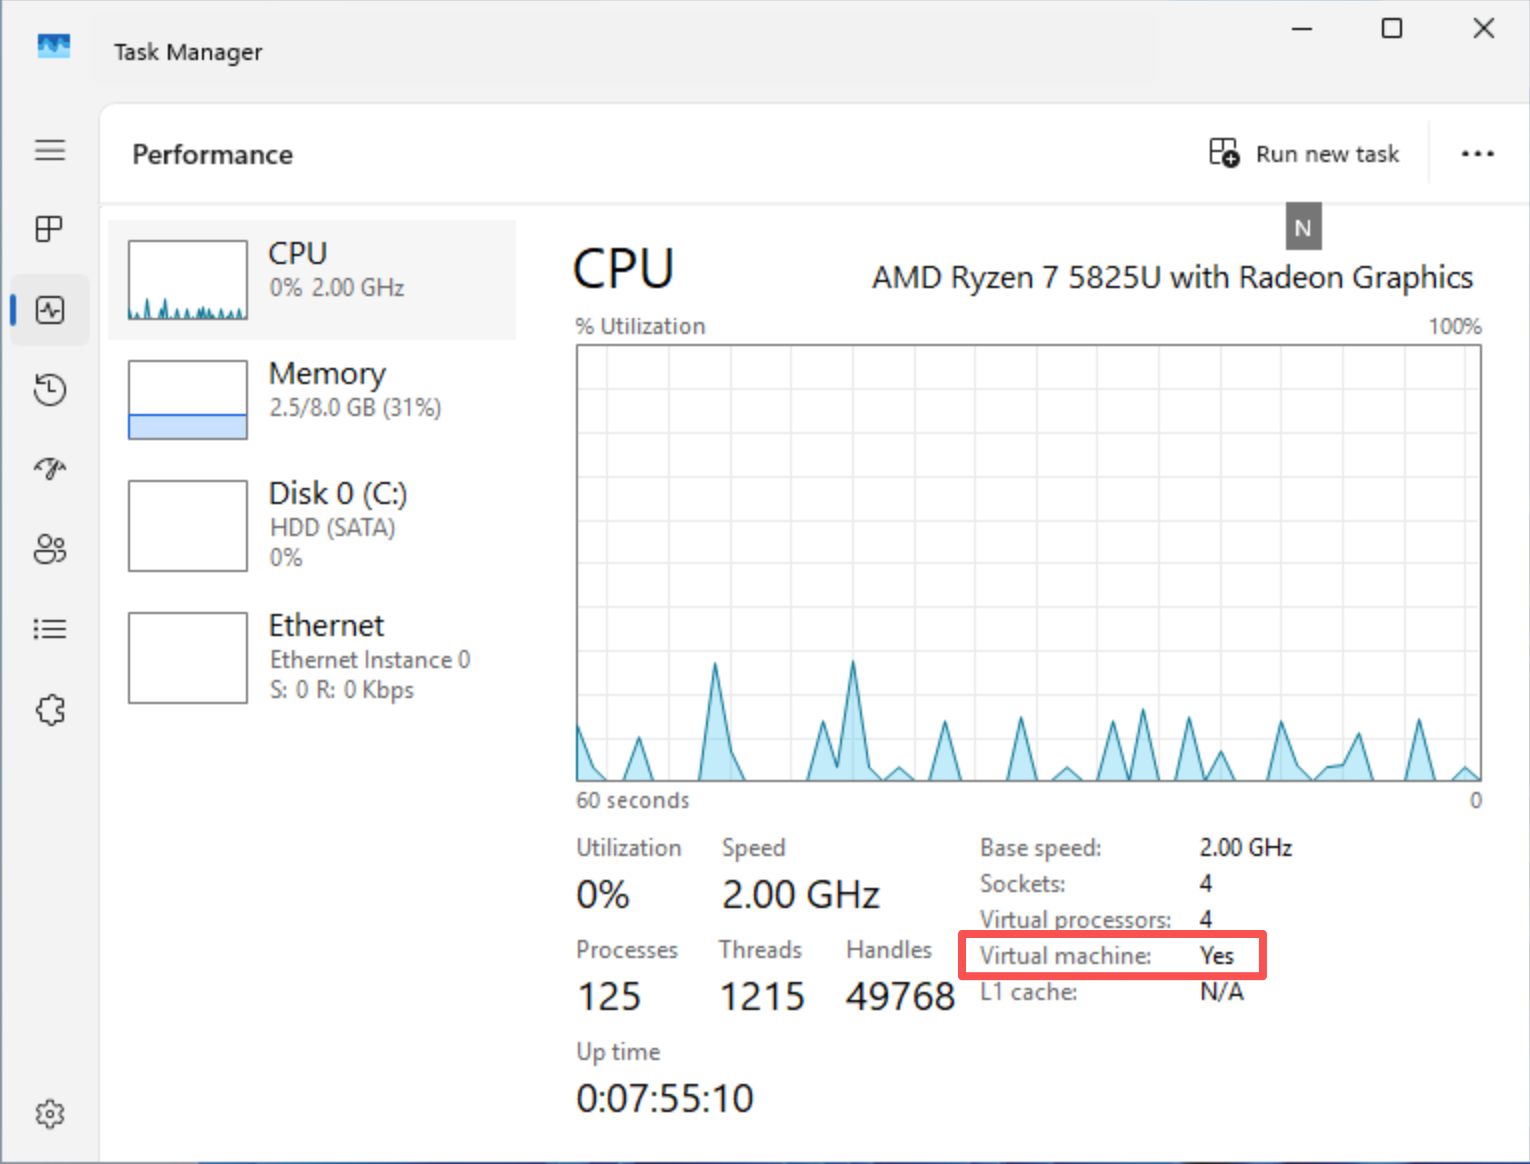
If it shows “Disabled”, you need to enter BIOS to enable it. Please refer to your computer or motherboard manual for setup details.
Open PowerShell as administrator, paste and execute the following command to install WSL2.
wsl --install
As shown below, the first time you execute this command will enable the WSL feature, and it will prompt you to restart the operating system.
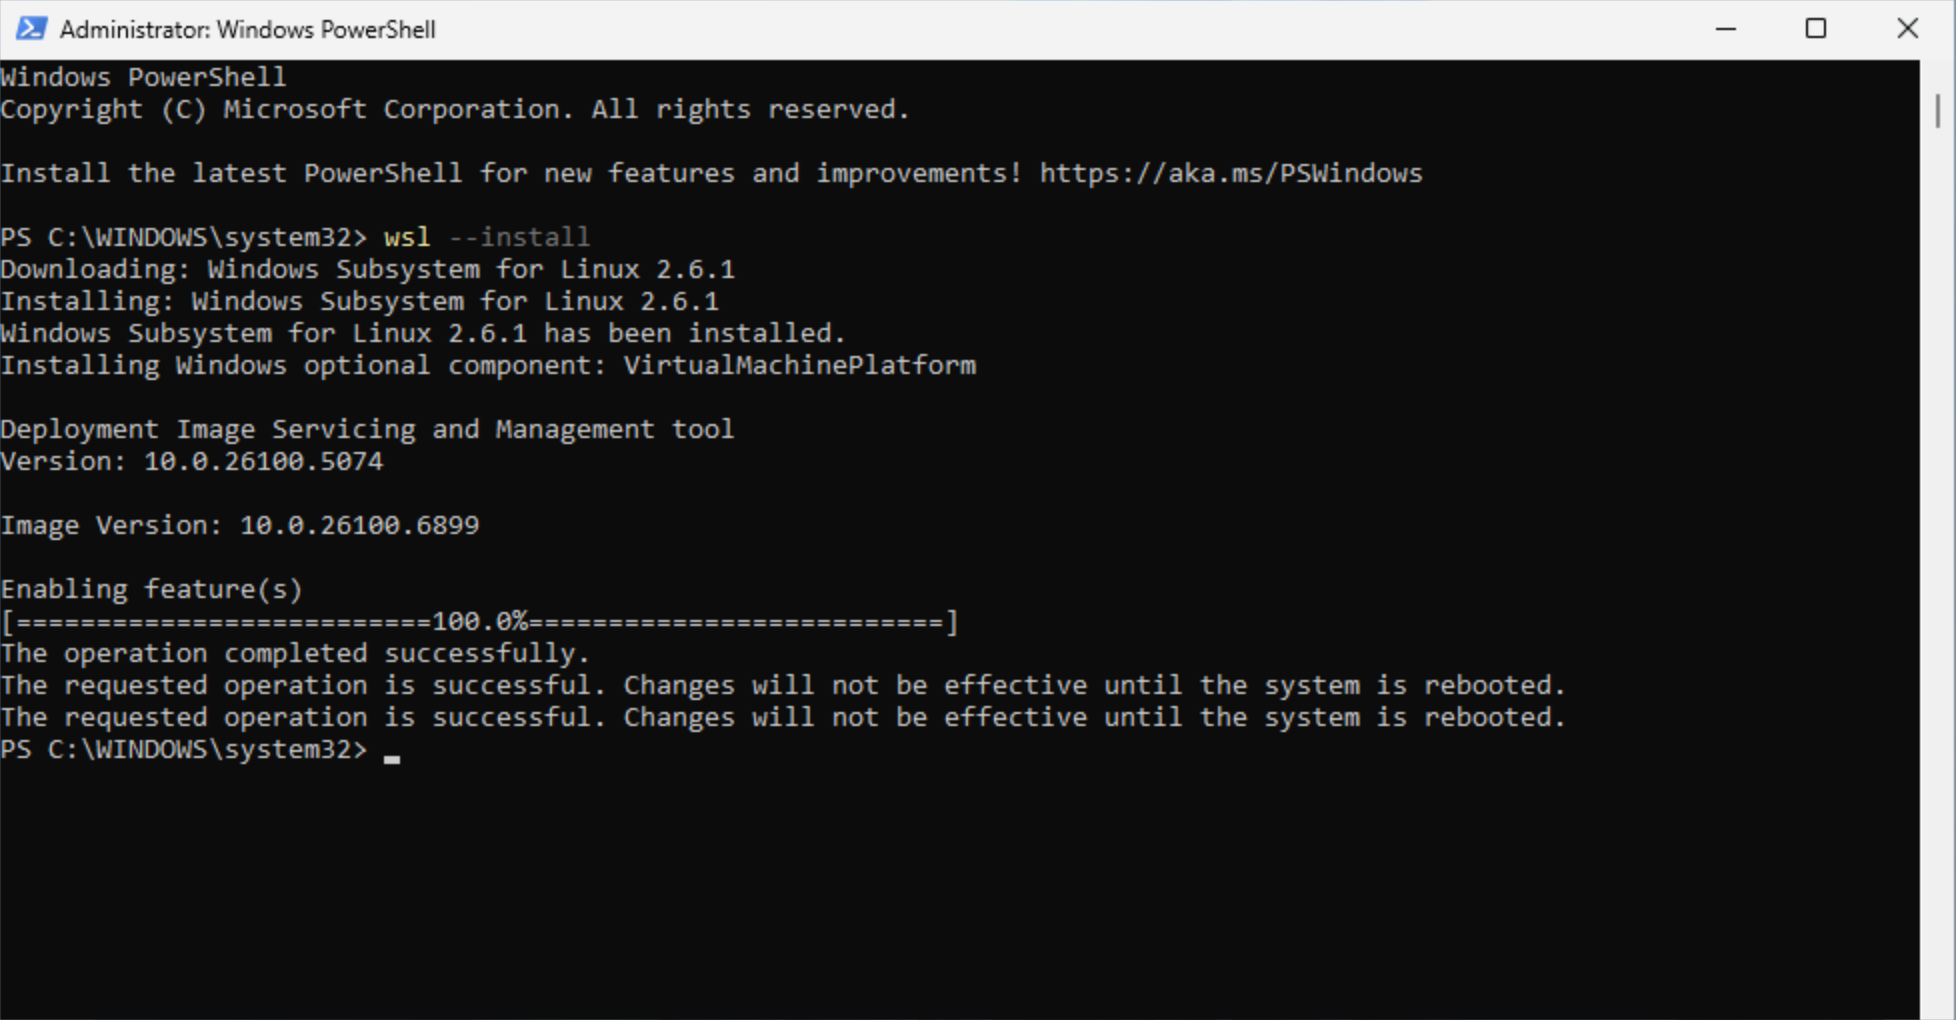
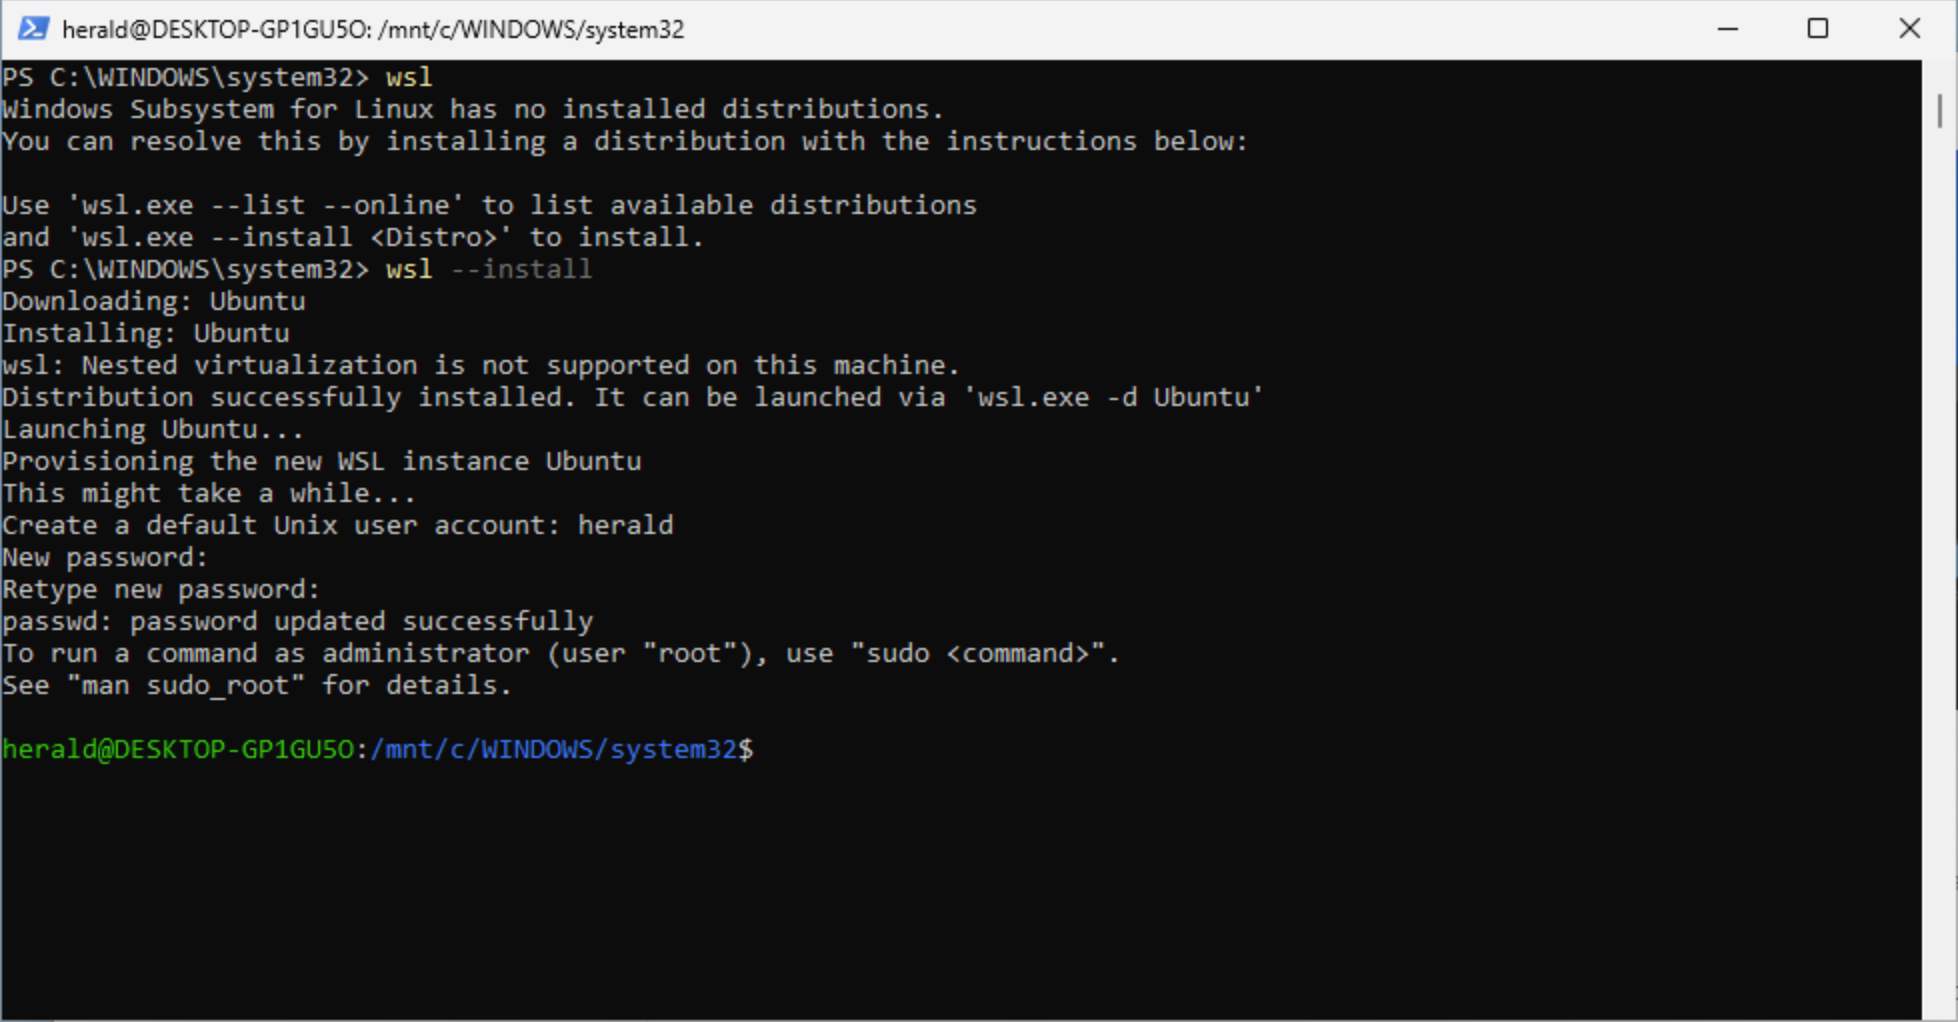
After restarting the system, execute this command again through PowerShell. It will automatically install the default Linux distribution (Ubuntu). Simply put, it officially installs a directly runnable Linux system on Windows.
As shown below, WSL will automatically download and install the Ubuntu system, then prompt you to set “username” and “password”. Set them according to the prompts. Then it will automatically enter the Linux terminal. You’ll notice that the Linux terminal prompt, both in name and color, is significantly different from PowerShell.
Using WSL2
After installation is complete, you can find the Ubuntu shortcut in the Windows Start menu to open this Linux system.
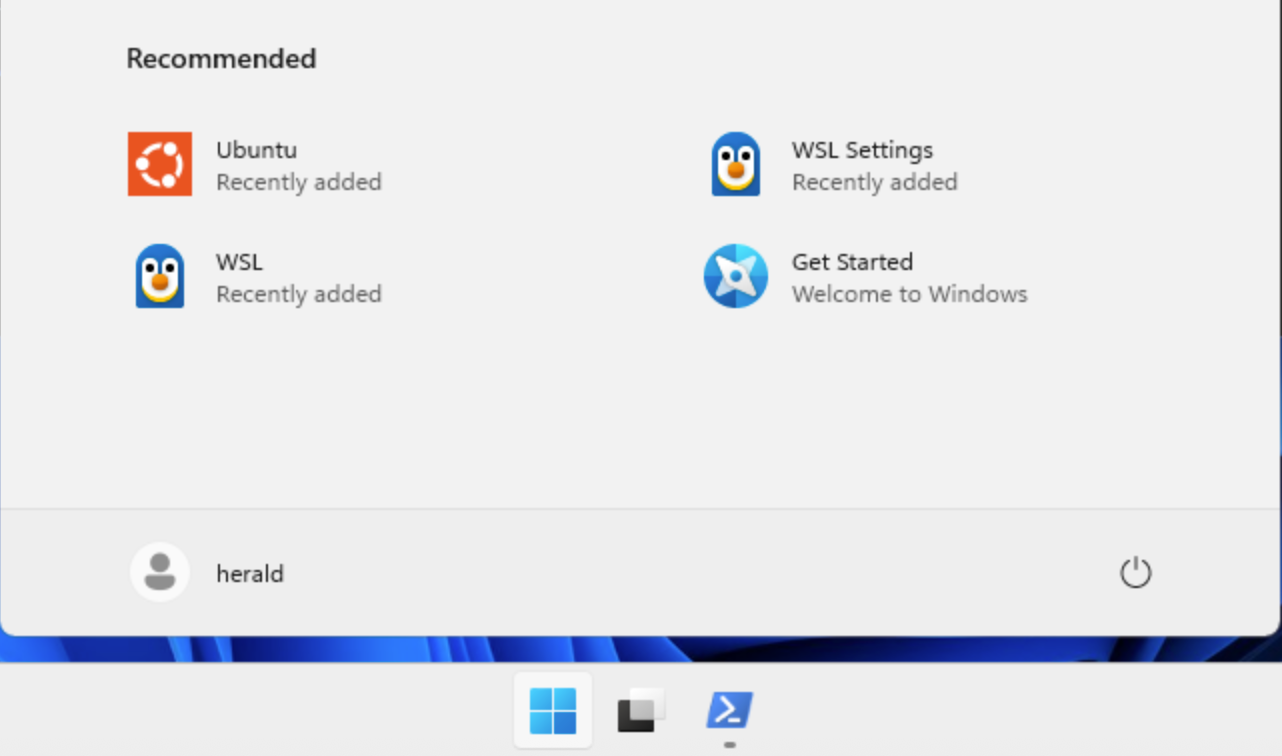
You can also directly enter wsl in PowerShell to start the default Linux system, as shown below:

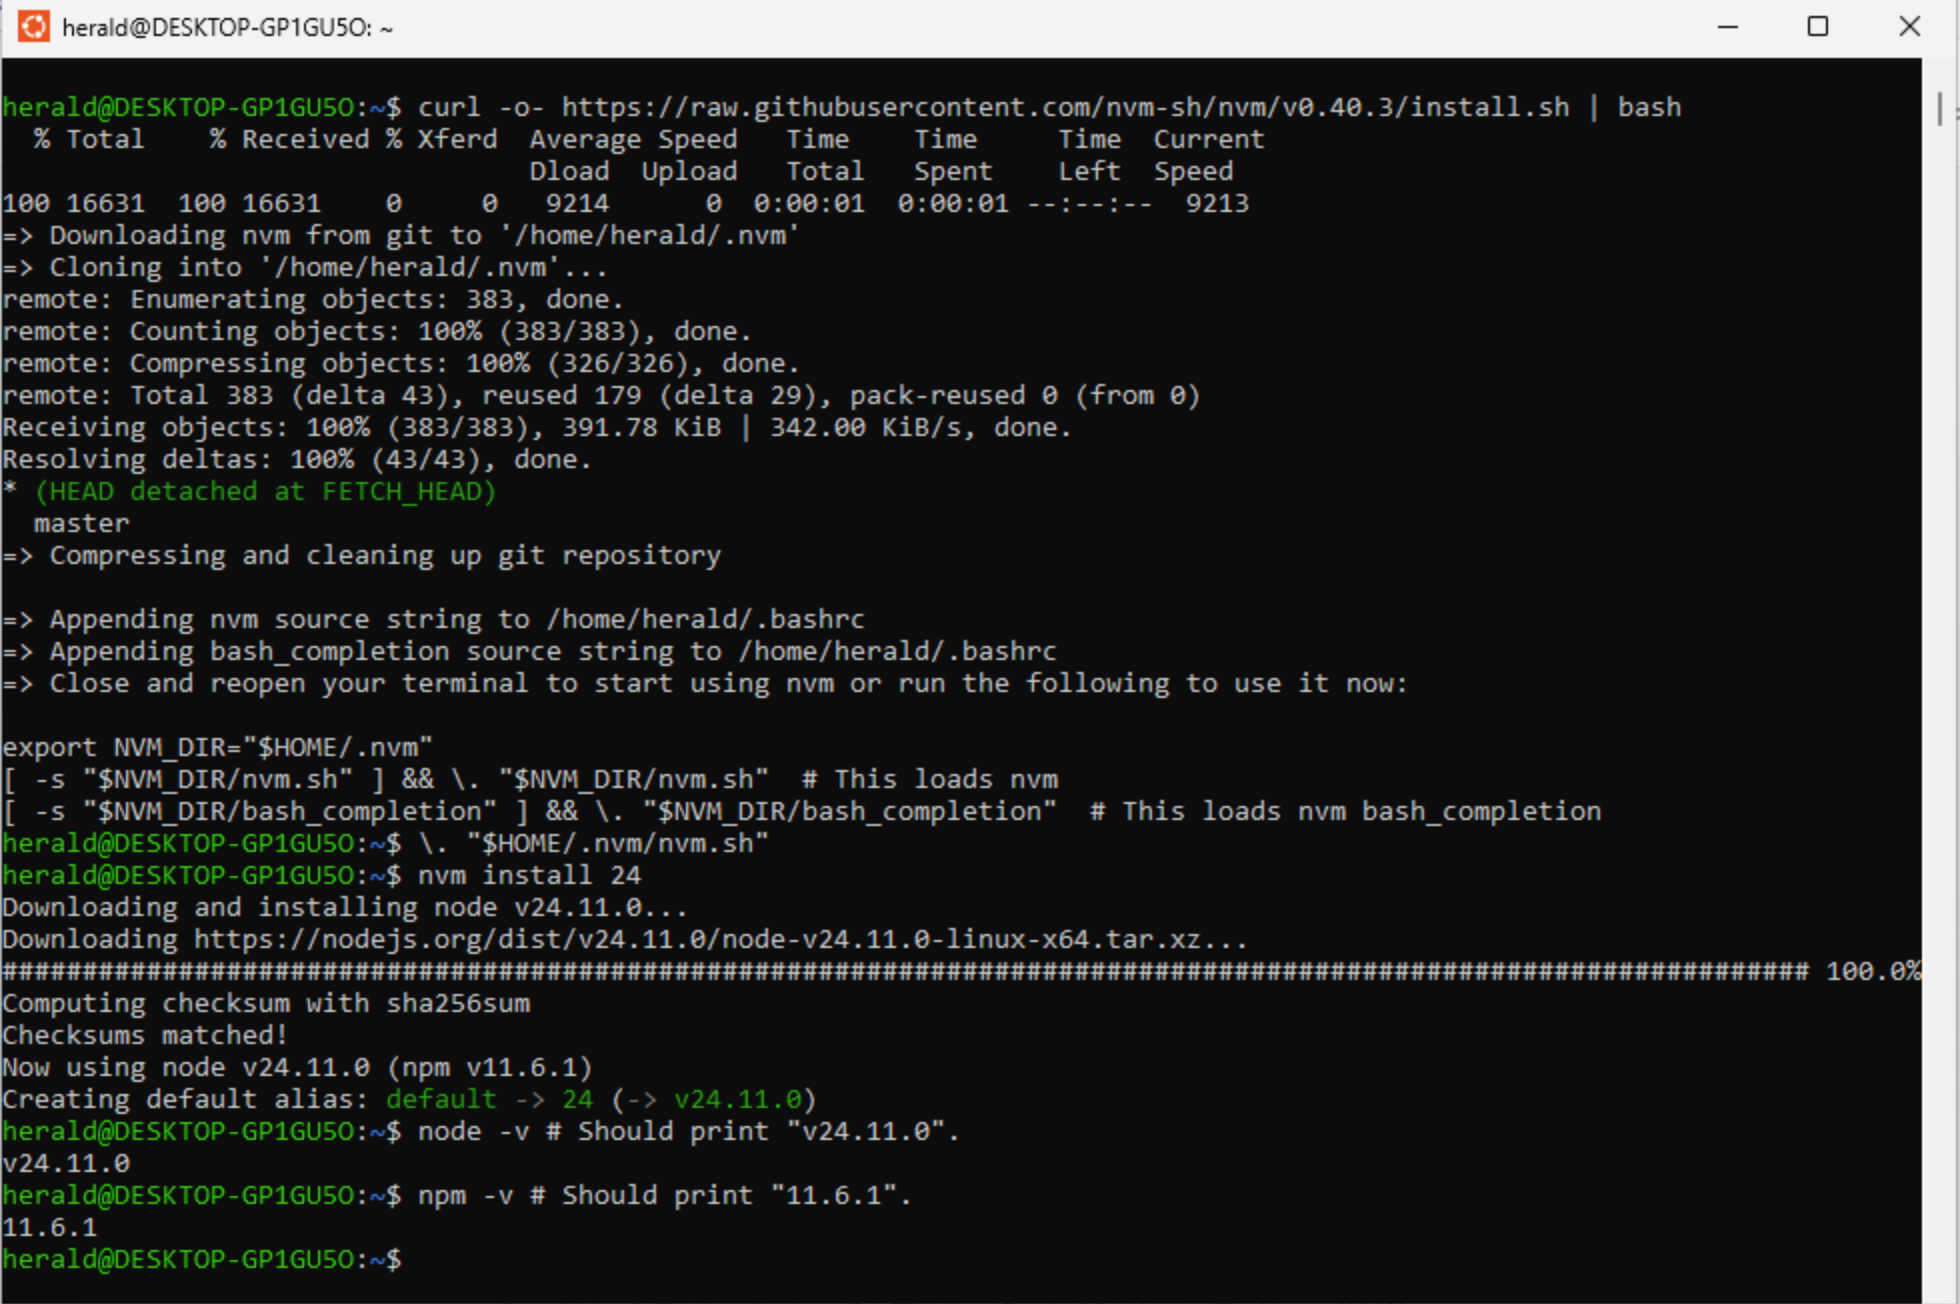
Great! Now you have a Linux operating system. Next, you can install NodeJS completely following Linux requirements using the corresponding installation commands.
As shown below, on the NodeJS official website download page, select Linux system, keep other default recommended options. The code box on the page provides installation code that you can use directly.

Note: Lines starting with
#are comments and usually appear in gray text. Other lines are installation code that needs to be executed, one line at a time. Copy and paste them into your WSL system for execution.
As shown below, paste and execute the commands provided by the website one by one. This completes the NodeJS installation.
Installing Claude Code
With WSL, meaning you have a native Linux operating system, and NodeJS environment successfully installed in previous steps, now you can install any AI programming assistants you want to use that depend on this environment in WSL.
According to Claude Code’s official documentation, execute the following command in WSL to install:
npm install -g @anthropic-ai/claude-code
After installation is complete, continue entering the command claude to start Claude Code, as shown below:
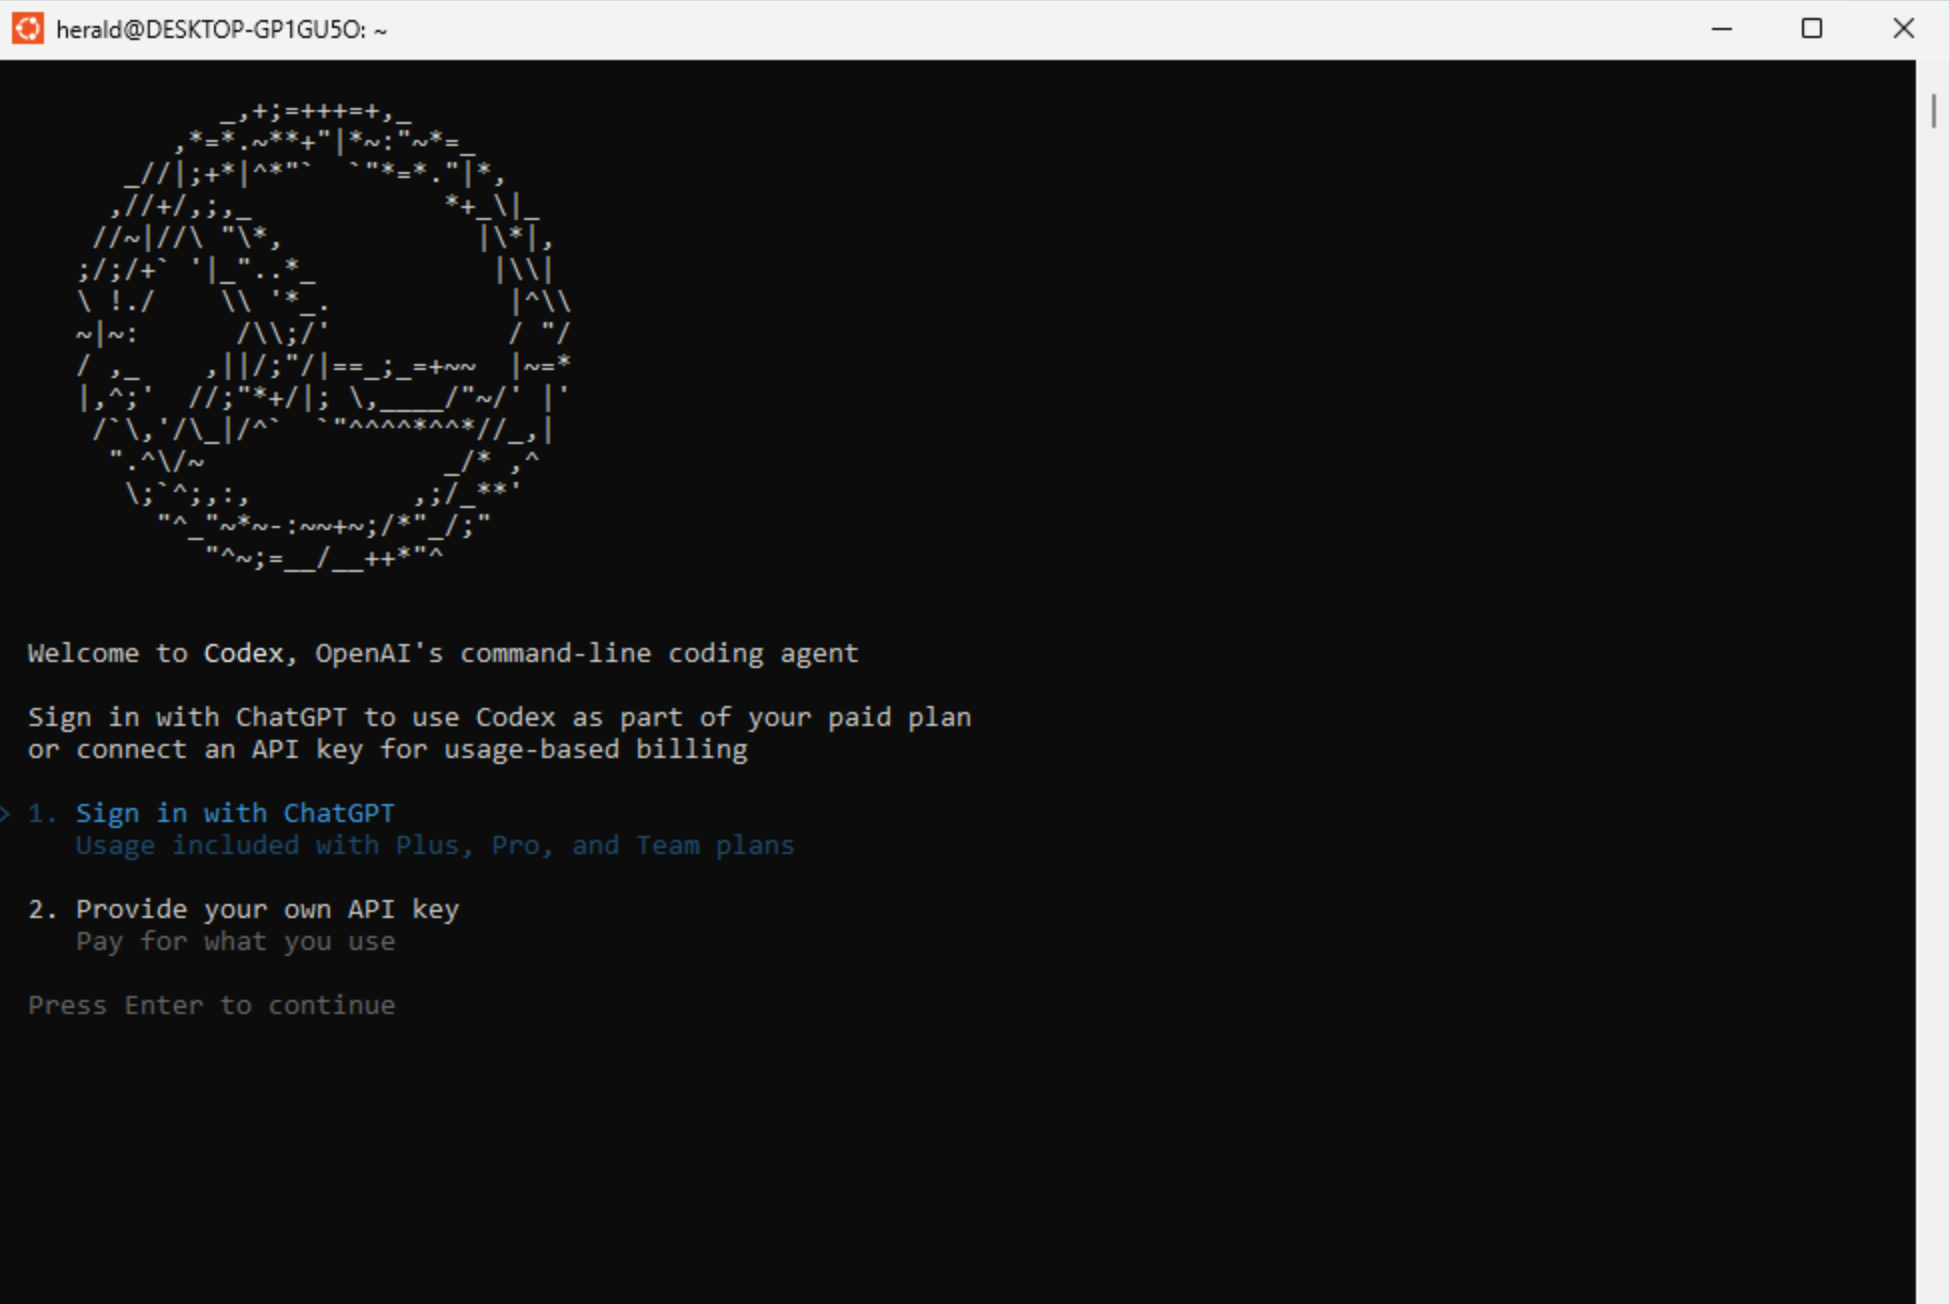
Similarly, to install OpenAI Codex, just follow the official documentation and execute the following command in WSL:
npm install -g @openai/codex
After successful installation, execute the codex command to start it.
And so on, any program based on NodeJS can be directly installed through npm commands in the Linux system terminal of WSL.
Directory Mapping Relationship Between WSL and Windows
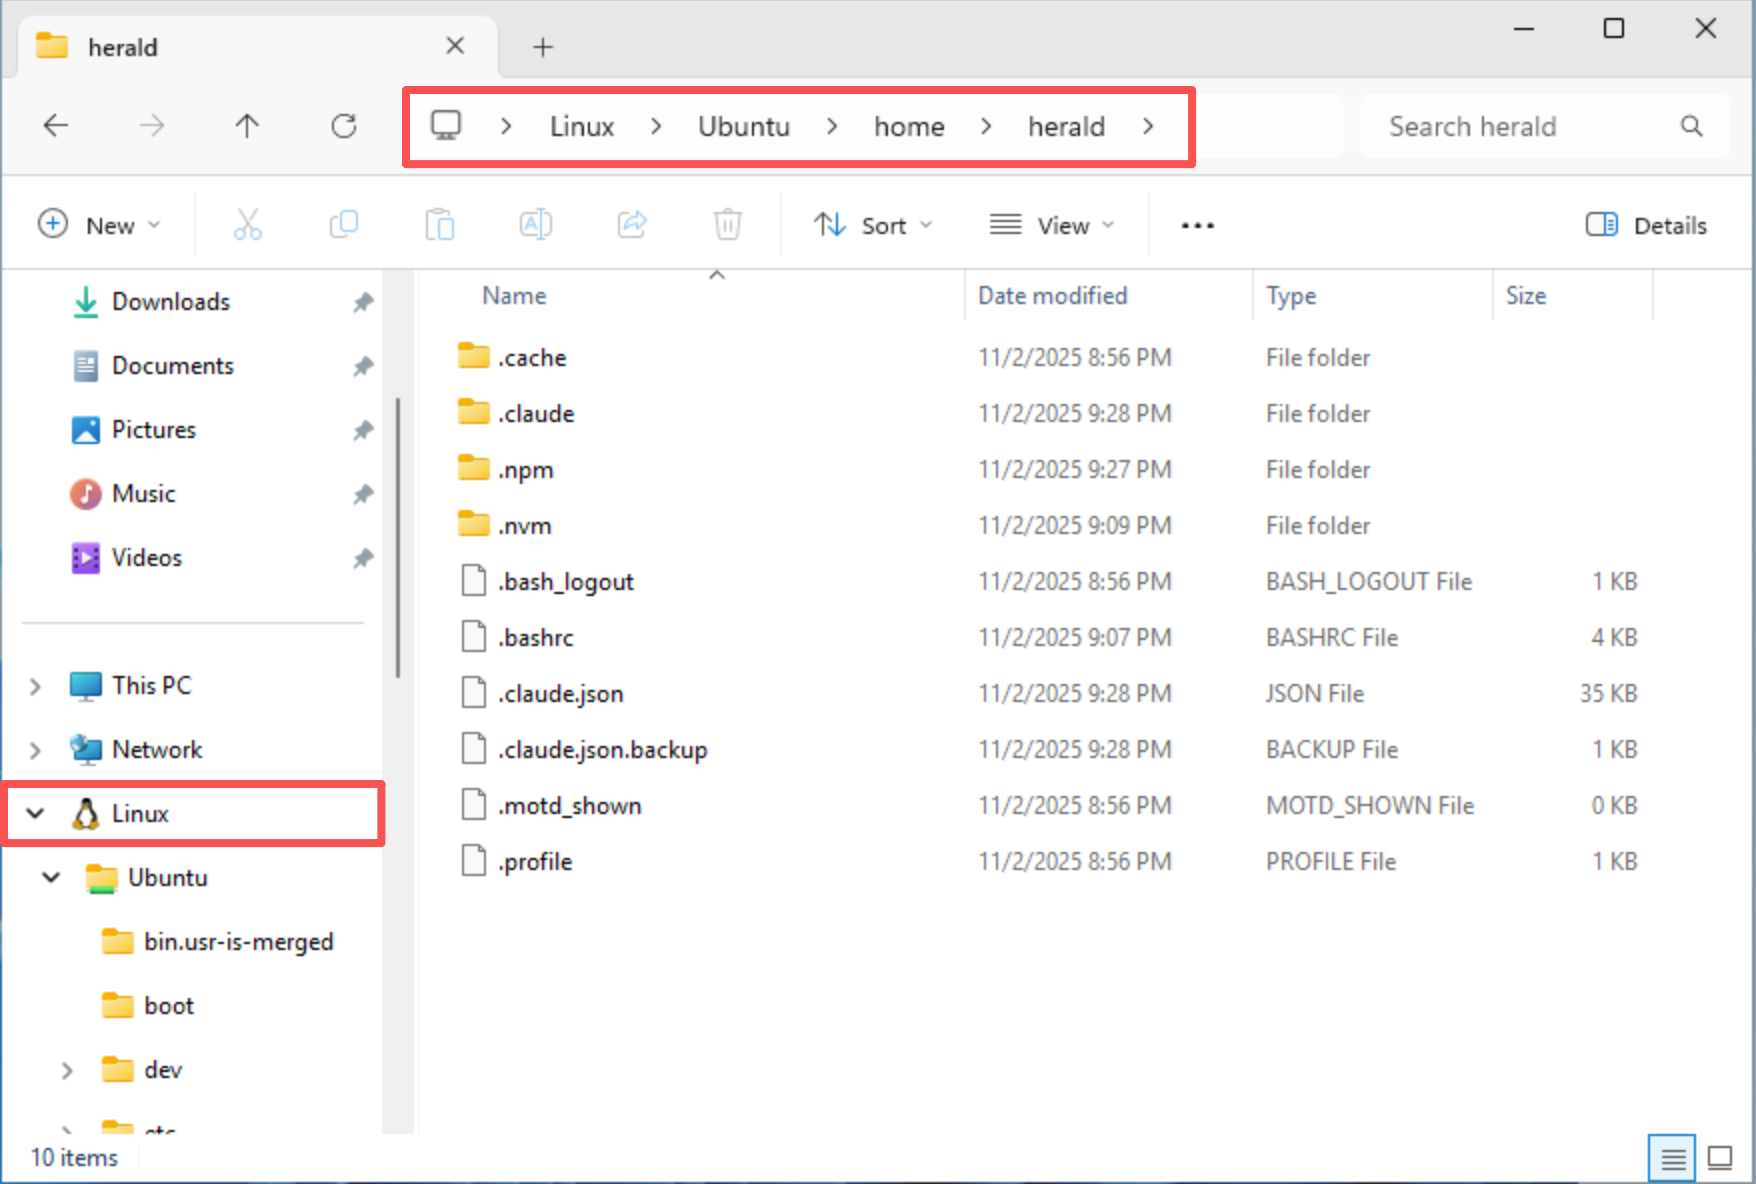
This is common knowledge that everyone using Linux systems through WSL on Windows should understand. You can find Linux in the left panel of Windows File Explorer, which lists system directories of all installed Linux distributions. You can follow this to find your AI working directories.
As shown below is the location of the default Linux distribution (Ubuntu) home directory in my system. When using AI programming assistants, work will inevitably be based on Linux system directories, so being able to accurately find the corresponding directory locations is very important.
Managing Code Versions with Git
If you’re just starting with AI programming, Git might also be an unfamiliar concept to you. But once you decide to delve deeper into programming (whether traditional manual programming or AI-assisted), Git is definitely a tool you must master.
Simply put, Git is a tool used to manage code versions, and the famous GitHub is a source code hosting platform based on Git.
The main reason you need to use Git alongside AI programming is that AI’s modifications to code have significant randomness. For example, if you’ve already directed AI to complete a certain software feature, but some small details need improvement, and if you don’t save the current code before further modifications, AI’s next actions might damage or overwrite existing code.
Git’s function is to save the current state of code (commit), so no matter how you modify existing code later, you can freely revert to the state at the time of saving (commit). In daily AI programming, whenever you direct an AI model to complete part of a feature, you can manually or directly have AI use Git to perform a commit.
Since the main goal of this guide is to help you build a working environment suitable for AI programming, Git-related usage won’t be further expanded. I believe the tutorials you’re learning should have relevant content. Here I’ll focus on introducing Git and related tools.
Installing Git
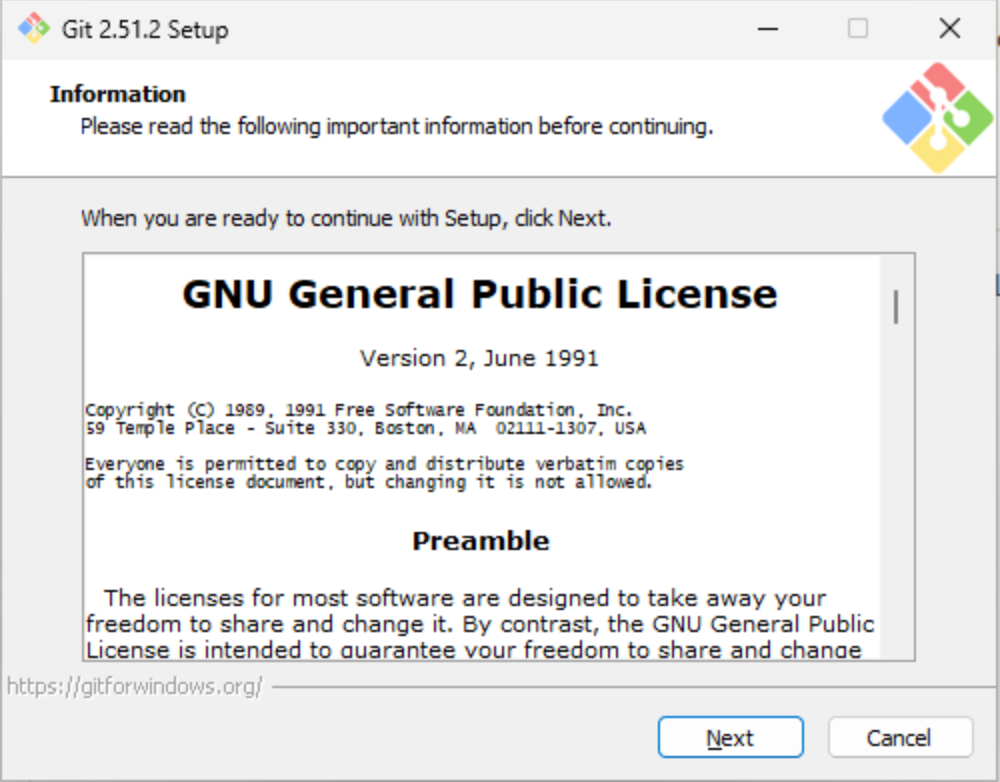
For Windows users, directly visit Git official website download page. As shown below, simply click the blue download link to get the latest compatible version.
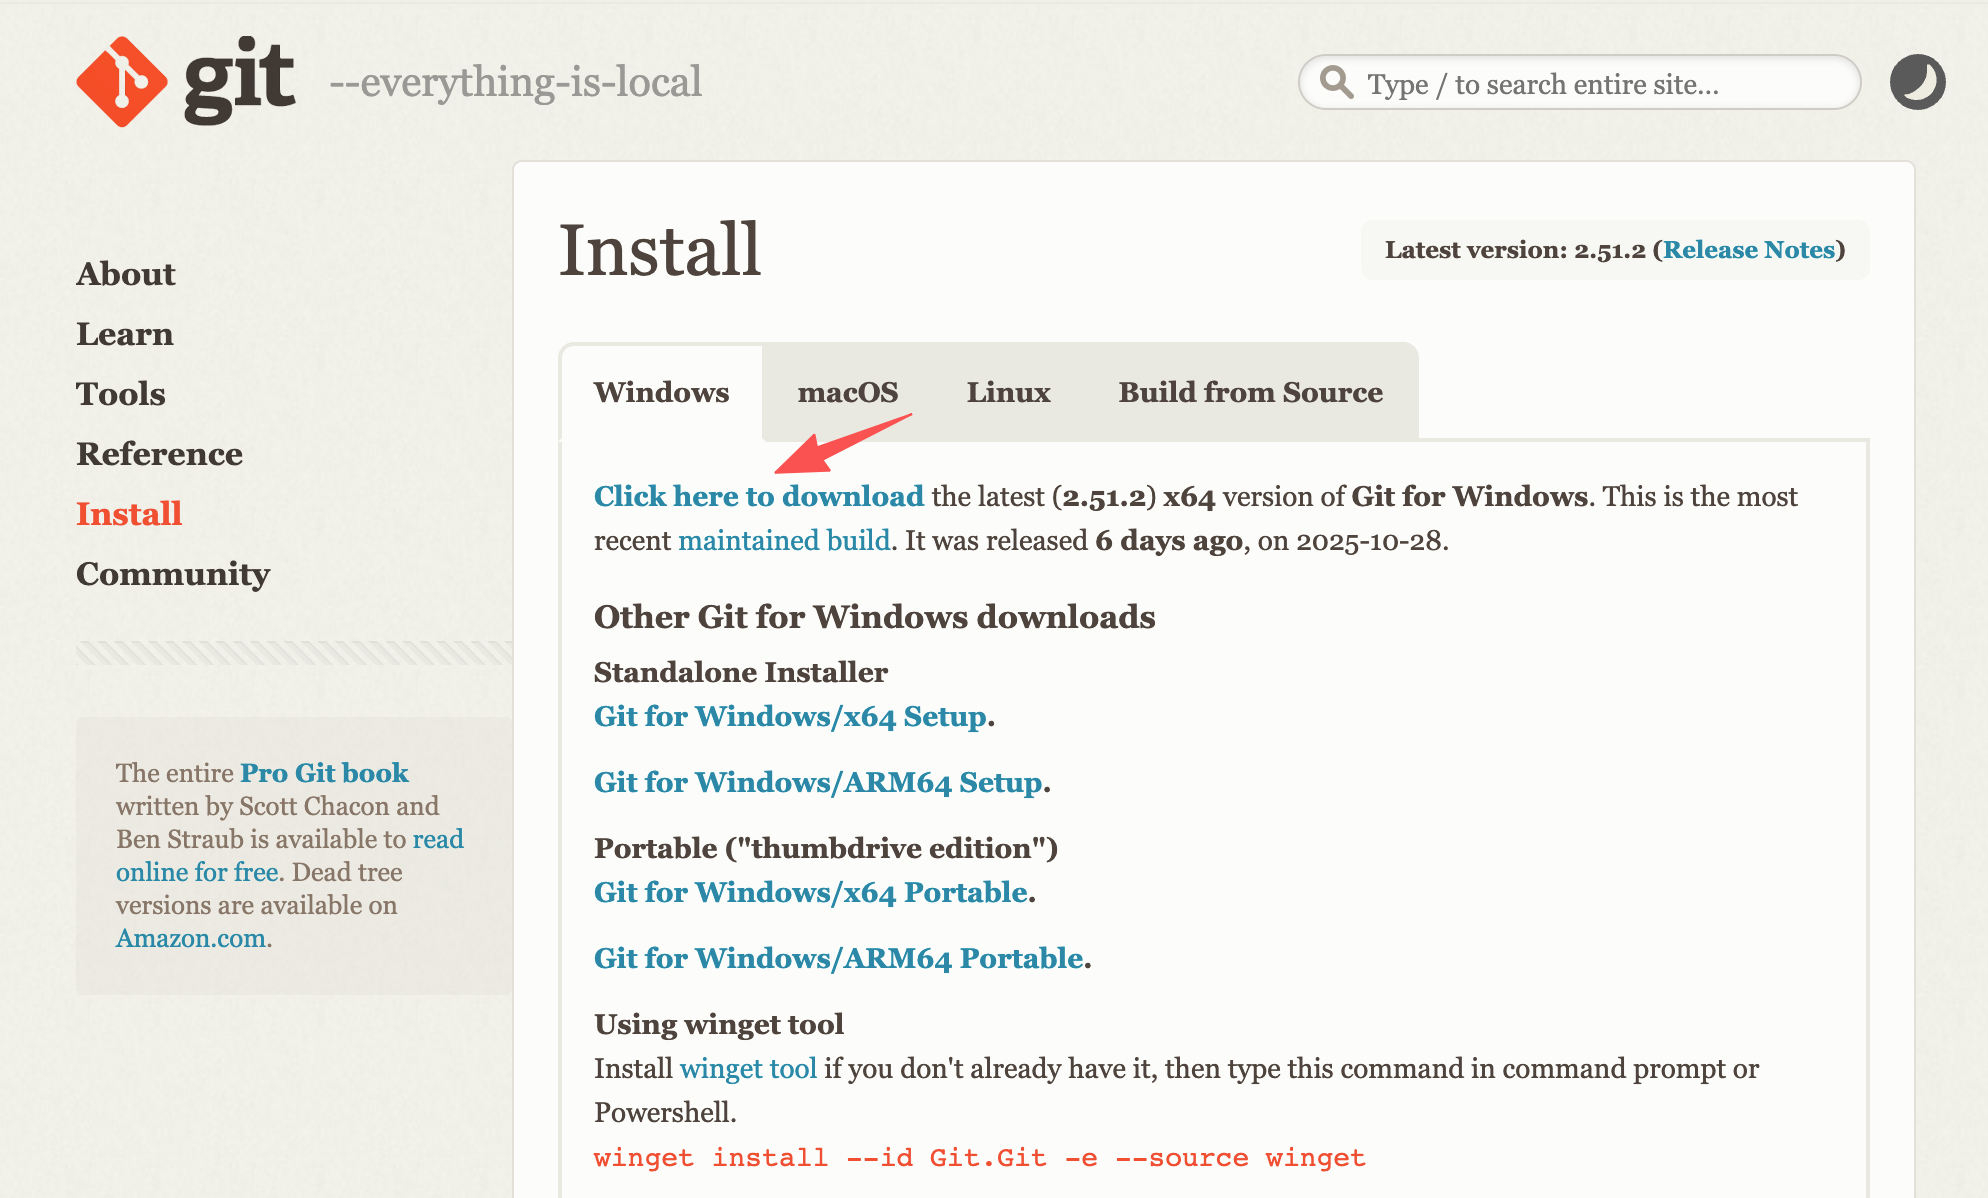
After downloading, install directly. For beginners, just click “Next” all the way.
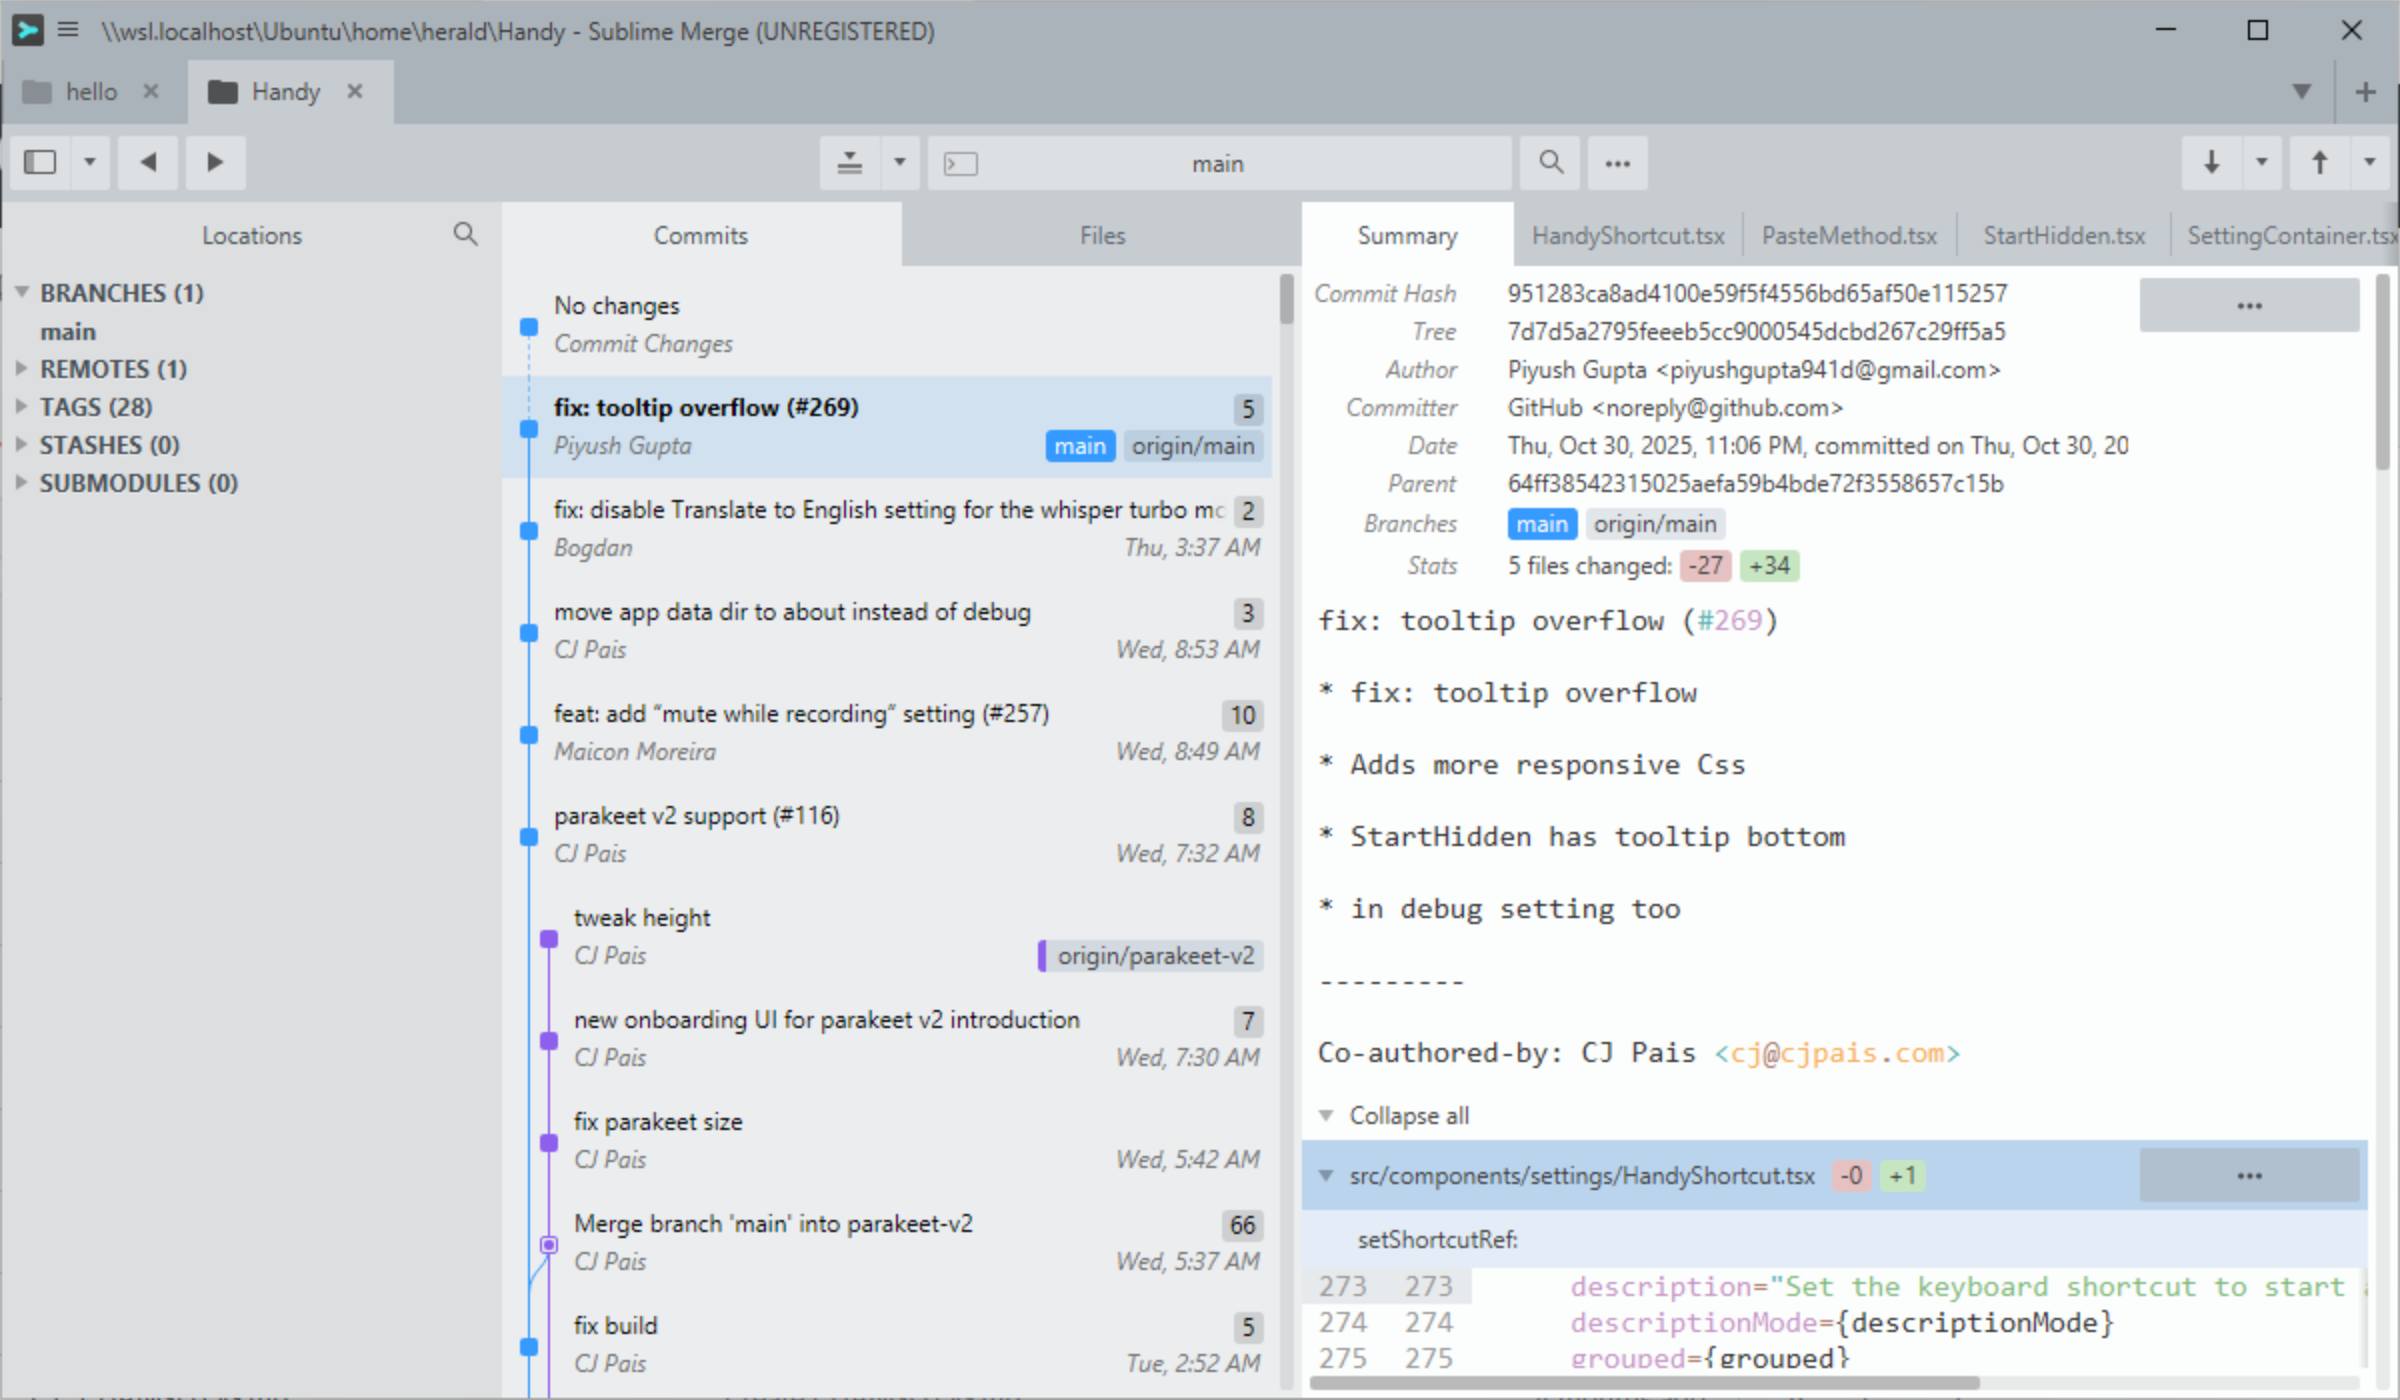
Managing Git with Sublime Merge
Git is a pure command-line tool, and beginners might find it difficult to remember numerous management commands. At this point, a graphical Git management tool becomes very necessary. There are actually many options, but here I’ll introduce one I personally use frequently: Sublime Merge.
Sublime Merge is paid software, but payment isn’t mandatory. It just occasionally pops up prompts asking if you want to purchase. That means you can use it permanently for free without paying. But if readers find it useful and their financial conditions allow, I recommend purchasing to support the author’s continued development.
Of course, you can also completely let AI programming assistants execute Git repository management commands, but having some related knowledge yourself is naturally better.
This concludes all the content of this guide. I hope this material helps you successfully install the NodeJS environment on Windows systems, as well as the AI programming assistants you need. I also wish you a smooth journey in AI programming learning and hope you create satisfactory works soon.
Author: TorchTree
Original URL: https://torchtree.com/en/post/windows-ai-programming-guide/
Publish Date: 2025-11-02
License: CC BY-NC-SA 4.0