How to Deploy Open Source Workflow Automation Software n8n with Docker + Caddy?
This page is also available in: 中文
n8n (node & node) is an emerging workflow automation tool designed to simplify and automate tasks across different applications and services. Its main advantages are its open-source nature, flexible workflow design, and support for a wide range of integrations. With a visual programming interface, n8n allows non-technical users to easily create complex automation tasks. It is a great alternative to workflow automation tools like Zapier, Integromat, or Microsoft Flow.
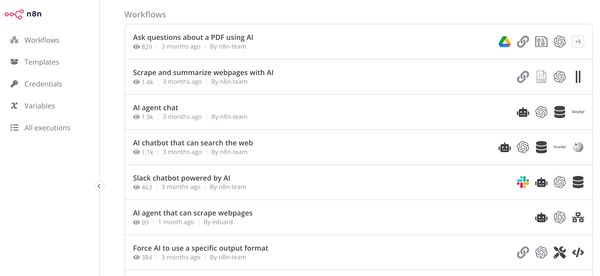
The main functionality of n8n is to connect various applications and services (currently supporting 387 integrations) to automate repetitive or complex tasks. For example, you can use n8n to create a workflow that automatically saves the content of new emails from your Gmail account to your Google Drive. Additionally, users can choose from a library of predefined automation workflows that meet their needs.
This article will explain how to install n8n on your own cloud server. However, if you are not familiar with cloud servers, Docker containers, Linux systems, or shell command lines, it is recommended to use the n8n cloud online version, which offers a free trial and a starting plan priced at $20/month.
Step 1: Environment Setup
1. Cloud Server and Domain Name
The article "How to Buy a Cloud Server" introduces the general process of purchasing a cloud server and lists some recommended cloud computing platforms. If you don't have a cloud server yet, you can refer to it for purchase.
If you are just starting to use n8n, you can start with a low-spec cloud server, such as vultr and digitalocean. A $6/month cloud server is sufficient to start.
The configuration of the cloud server used in this article is as follows:
- Hardware specifications: 1 CPU core, 1 GB RAM, 25GB disk
- Operating system: Ubuntu Server 22.04 LTS
You also need to prepare a domain name. If you don't have one, please refer to the article "How to Register a Domain Name" to register one, and then point the A record of the domain name to the public IPv4 address of the cloud server.
In this article, the domain name used is
torchtree.comas an example. Please replace it with your own domain name.
2. Install Docker
The easiest way to install Docker is to use the official installation script, which will automatically download the necessary programs and resources. However, it is not recommended to use the script for production environments in enterprise applications.
# Download the installation script
curl -L https://get.docker.com -o docker.sh

# Execute the installation
bash docker.sh

# Check if the installation is successful (if the command returns command help, it means the installation is successful)
docker
3. Install Caddy
Caddy can be installed directly on the host or in a Docker container. To simplify management, we will install it in a Docker container.
# Create and edit the configuration file
nano Caddyfile

# Add configuration information to the Caddyfile
torchtree.com {
  reverse_proxy 172.17.0.1:5678
}
Create a Docker container for Caddy and start it. The command will automatically pull the latest Caddy image and create a container.
sudo docker run -d --name caddy \
  -v ./Caddyfile:/etc/caddy/Caddyfile \
  -v caddy_data:/data \
  -v caddy_conf:/config \
  -p 80:80 \
  -p 443:443 \
  --restart unless-stopped \
  caddy
4. Install n8n
n8n requires an SQL database and by default, it uses SQLite. It also supports using Postgres database.
Using SQLite Database (Recommended)
# Create a persistent volume (for storing n8n configuration files)
sudo docker volume create n8n_data

# Create n8n application container
docker run -it --rm \
  --name n8n \
  -p 5678:5678 \
  -e GENERIC_TIMEZONE="Asia/Shanghai" \
  -e TZ="Asia/Shanghai" \
  -v n8n_data:/home/node/.n8n \
  --restart unless-stopped \
  docker.n8n.io/n8nio/n8n
Using Postgres Database
# Create a persistent volume (for storing n8n configuration files)
sudo docker volume create n8n_data

# Create n8n application container, replace <> with actual database information.
  --name n8n \
  -p 5678:5678 \
  -e GENERIC_TIMEZONE="Asia/Shanghai" \
  -e TZ="Asia/Shanghai" \
  -e DB_TYPE=postgresdb \
  -e DB_POSTGRESDB_DATABASE=<POSTGRES_DATABASE> \
  -e DB_POSTGRESDB_HOST=<POSTGRES_HOST> \
  -e DB_POSTGRESDB_PORT=<POSTGRES_PORT> \
  -e DB_POSTGRESDB_USER=<POSTGRES_USER> \
  -e DB_POSTGRESDB_SCHEMA=<POSTGRES_SCHEMA> \
  -e DB_POSTGRESDB_PASSWORD=<POSTGRES_PASSWORD> \
  -v n8n_data:/home/node/.n8n \
  --restart unless-stopped \
  docker.n8n.io/n8nio/n8n
5. Access the n8n Interface and Complete the Initial Setup
Once n8n is up and running, you should verify that it is functioning correctly. This typically involves accessing the n8n web interface and trying out some basic workflow operations.
Access the domain name that you have bound to your cloud server, such as https://torchtree.com, follow the prompts on the interface to set up a username and password, and then you can start using it normally.
In particular, Caddy is used here as the web server, which can automatically handle the issuance and configuration of HTTPS certificates.
This article was published on 2024-01-14 and last updated on 2024-01-16.
This article is copyrighted by torchtree.com and unauthorized reproduction is prohibited.